mod_deflate.conf
In the folder .devcontainer/docker/ you have created an empty file called mod_deflate.conf. Here are the contents to put in this file:
<filesMatch "\.(js|html|css)$">
    SetOutputFilter DEFLATE
</filesMatch>
We will explain its usefulness in the chapter “Dockerfile” just after the definition of the Dockerfile.
This file is purely optional, just delete the line referring to it in the Dockerfile if you don’t want to include it.
Dockerfile
Objective: create a docker image in order to build a container with Linux, Apache, and PHP. MySQL will be in a separate container.
First we will create a Docker image from which we will build a container.
FROM centos:7


RUN yum update -y
RUN yum install -y wget
RUN wget https://dl.fedoraproject.org/pub/epel/epel-release-latest-7.noarch.rpm
RUN wget http://rpms.remirepo.net/enterprise/remi-release-7.rpm
RUN rpm -Uvh remi-release-7.rpm epel-release-latest-7.noarch.rpm
RUN yum install -y yum-utils
RUN yum-config-manager --enable remi-php73
RUN yum install -y \
        php php-common php-opcache php-cli php-gd php-curl php-mysql php-xdebug \
        mod_ssl \
        openssl \
        mysql \
        mlocate \
        vim \
        iproute \
        php-intl

# the "mysql" client package is installed because it will permit you to test later your MySQL database if needed


# Activation xdebug + définition timezone + installation apache with http2 enabled
RUN echo "zend_extension=/usr/lib64/php-zts/modules/xdebug.so" >> /etc/php.ini && \
        echo "xdebug.remote_enable=1" >> /etc/php.ini && \
	echo "xdebug.remote_autostart=1" >> /etc/php.ini && \
	echo "xdebug.remote_host=localhost" >> /etc/php.ini && \
	echo "xdebug.remote_port=9000" >> /etc/php.ini && \
	sed -i 's,^;date.timezone =.*,date.timezone = "Europe/Paris",' /etc/php.ini && \
	# Following line permit us to install a recent version of httpd which comes with http2 mod
	cd /etc/yum.repos.d && wget https://repo.codeit.guru/codeit.el`rpm -q --qf "%{VERSION}" $(rpm -q --whatprovides redhat-release)`.repo && \
	yum install -y httpd


#
# xdebug.remote_host=<ip-of-debug-client-machine>
# xdebug.remote_host to IP of your host machine, from where you would remote debug the application
# xdebug.remote_port=9000 => This port is important, it will be used by Visual Studio Code

# Clean all yum cache in order to reduce image size (must be done after all yum instructions)
RUN yum clean all
# COPY command make a copy from the build path
# The build path is defined with the build command line (in docker CLI) or with the instruction "build: context:" in the file called docker-compose.yml
COPY ./docker/mod_deflate.conf /etc/httpd/conf.d/mod_deflate.conf


EXPOSE 80
# ENTRYPOINT ["executable", "param1", "param2"] =>
ENTRYPOINT ["/usr/sbin/httpd", "-D", "FOREGROUND"]
Our Dockerfile is created.
We can build our image from this Dockerfile.
As you can see, this Dockerfile refers to the .devcontainer/docker/mod_deflate.conf file, this file is copied to the apache configuration folder. It will be taken into account and loaded automatically by apache. This configuration activates compression in apache for the transfer of content of type *.js, *.css and *.html. This is optional but we enable it in order to be in a production-like environment (compression is usually enabled in production).
Now, go to the folder that contains this Dockerfile, it should be the folder docker.ltb.com/.devcontainer/ and run the following build command:
docker image build -f Dockerfile --no-cache -t lampx:v1.0 .Explanations:
- first of all don’t forget the “.” at the end of the command line, this is the buid path, and in our case this “.” refers to the current folder.
- lampx:v1.0 => lampx is the name we give to the build image and v1.0 is the tag we give to this build. A tag is a bit similar to a tag on a git repository, it allows you to identify a version of your image. We will explain it at the end of the article in the “To go further” section.
Note that the name “lampx” is a little bit abusive since the MySQL server is not embedded in this image.
You can check that your image has been created:
docker image lsYou can start a container from this image:
docker run --name dockerltb -d -p 7080:80 lampx:v1.0 -p 7080:80 means that port 7080 of your PC “maps” port 80 of the container, you can try to access the url http://localhost:7080/
And then connect to this container:
docker exec -it dockerltb /bin/bash
You are then logged in as a command prompt to the OS embedded in your Container. You can execute the usual linux commands.
To exit the container enter the linux command: exit
It is important to note the interest of being able to connect to the container: it can allow you to debug in certain situations.
Now let’s stop the container and delete it:
docker container stop dockerltb
docker container rm dockerltb
docker compose to orchestrate your containers
docker-compose.yml
# the attribute version tells which file format is accepted, see https://docs.docker.com/compose/compose-file/compose-versioning/
version: '3.7'
services:
    dockerltb:
      image: lampx:v1.0
      # /var/www/docker-lampx.lateambichon.com/ is the folder that contains your project source code. This folder will be created inside your container
      volumes:
       - ./docker/docker-lampx.lateambichon.conf:/etc/httpd/conf.d/docker-ltb.conf # load your own VirtualHost
       - ../:/var/www/docker-lampx.lateambichon.com/
      ports:
       - "7080:80"
       - "7443:443"
      networks:
        - mynetwork

    mysql:
      image: mysql:8
      command: ['--character-set-server=utf8mb4', '--collation-server=utf8mb4_unicode_ci', '--default-authentication-plugin=mysql_native_password']
      ports:
       - "33070:33060"
       - "3307:3306"
       # 3307 is the post accessible by the host (your laptop)
       # 3306 is the port accessible by the containers that are declared on the network mynetwork, it means accessible by the other containers that use this network (it is the case of the container called docker-ltb)
      environment:
        - MYSQL_ROOT_PASSWORD=root
        - MYSQL_DATABASE=dockerltb
        - MYSQL_USER=dockerltb
        - MYSQL_PASSWORD=password
      volumes:
        - ./docker/dump_database.sql:/docker-entrypoint-initdb.d/dump_database.sql
      networks:
        mynetwork:
          aliases:
            - "dockerltb.mysql.db"
            - "docker-mysql"
            - "mysql"
            - "db"


# Here we declare the network called mynetwork. This network allows the two isolated containers to communicate each together
# We can verify this network creation with the following command line: docker network ls
# NOTE: on the Internet we'll find the keywork "links" which allows containers to communicated each other but this keyword is deprecated, today you should use the keyword networks instead
networks:
  mynetwork:
Within this docker-compose-.yml file we can notice the keyword “services” which allows us to introduce the name of the containers we are going to start.
The first container is the dockerltb container, and in the settings of this container you can observe the definition of volumes:
- we map our local file ./docker/docker-lampx.lateambichon.conf to the file /etc/httpd/conf.d/docker-ltb.conf within the container
- we map the source folder of our project to the /var/www/docker-lampx.lateambichon.com folder within the container
docker-lampx.lateambichon.conf
Our docker-compose.yml refers to a docker-lampx.lateambichon.conf file. This file contains the definition of our apache VirtualHost:
<VirtualHost *:80>
    DocumentRoot "/var/www/docker-lampx.lateambichon.com"
    ServerName localhost

    <Directory /var/www/docker-lampx.lateambichon.com>
        Options -Indexes -MultiViews -FollowSymLinks
        AllowOverride All
        Order allow,deny
        Allow from all
    </Directory>
</VirtualHost>
Start your containers: docker-composes up
Go to the .devcontainer/ folder and execute the command line:
docker-compose up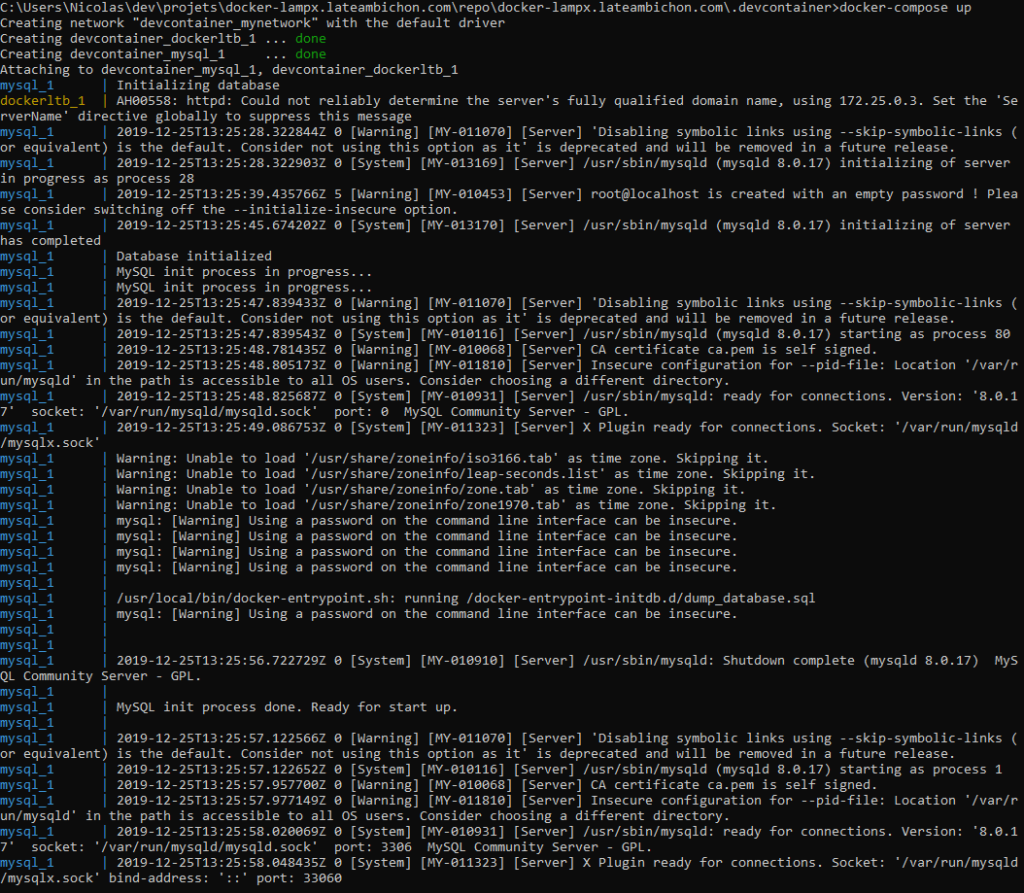
You will observe a set of logs stating the startup status of the different containers specified in your docker-compose-.yml.
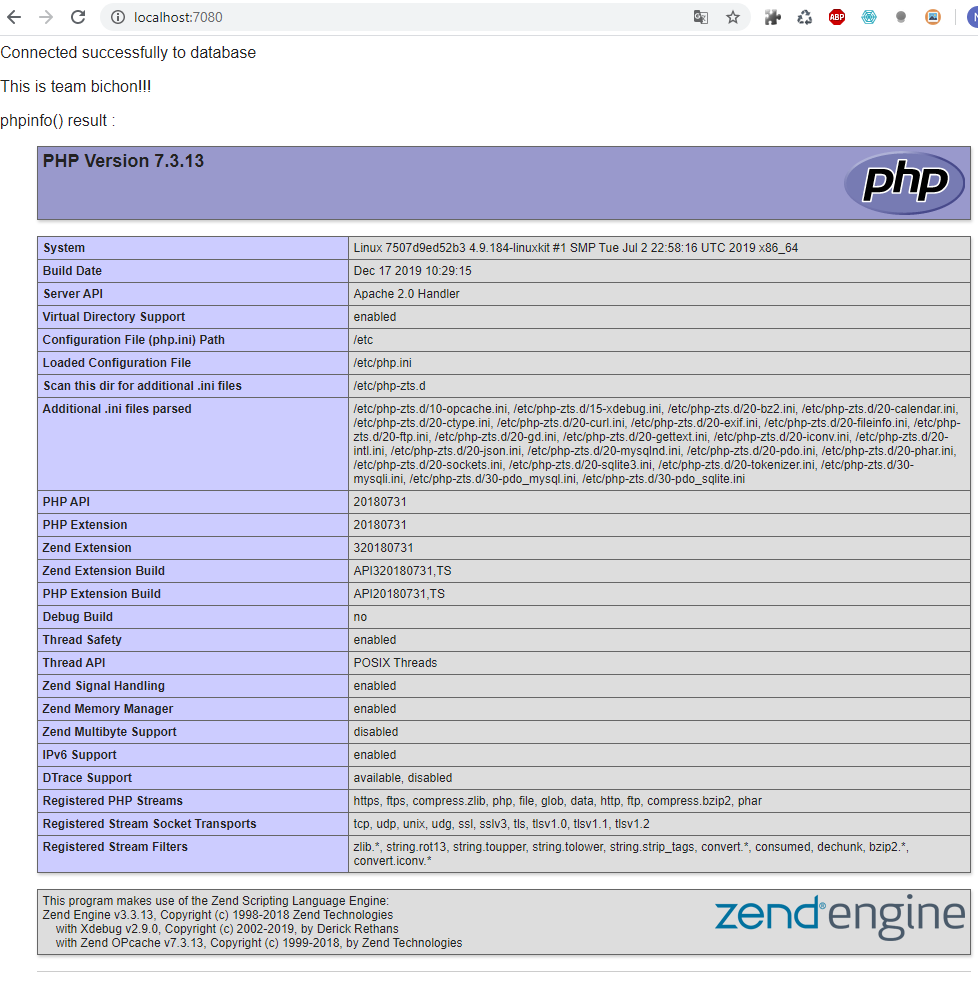
When startup is complete, you can check that you can connect with your internet browser on port 7080. Remember the definition of the dockerltb service, we have specified a port mapping 7080:80 which means that all actions performed on port 7080 of our host (your PC/laptop) will be executed on port 80 of the dockerltb container, and this is bidirectional.
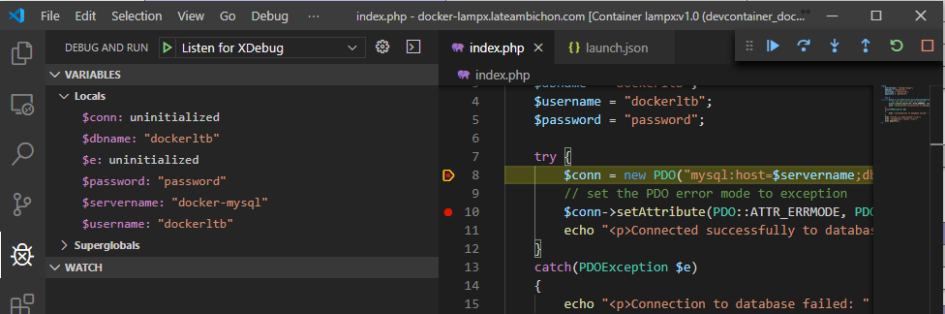
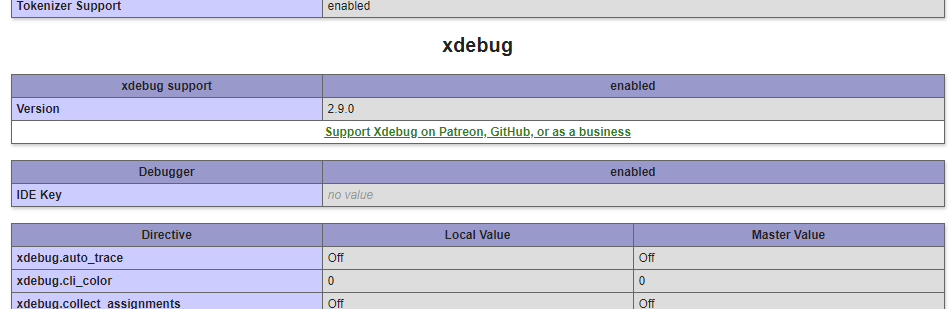
If you go further down the page, you can check that xdebug is enabled:
A simple stop
A simple stop
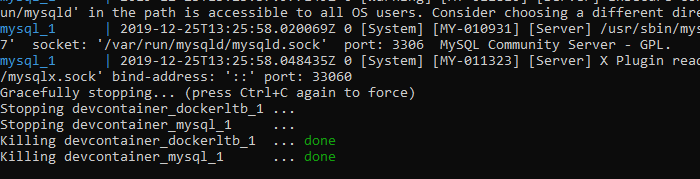
At the command prompt where you ran docker-compose up, press Ctrl+C twice.
Wait a few seconds, all started containers will be stopped.
You can then simply restart the containers via:
docker-compose upA little more than just a stop
Sometimes, docker-compose goes off the rails like fucking bichon balls. 😯
Symptoms are for example: your containers don’t seem to work anymore whereas it had always worked before, or you can’t connect your Visual Studio Code to one of the containers started by docker-composer…
In this case don’t panic, a kind of “reset” consists in executing the following command after having stopped the containers via Ctrl+C Ctrl+C:
docker-compose downBy default, without any additional options, the docker-compose down command deletes:
- the containers defined as services in your docker-compose file
- the networks defined in the networks section of the docker-compose file
- The default network if one is used
Please refer to the online documentation if you want to learn more about this command: https://docs.docker.com/compose/reference/down/
To restart the containers, simply execute the following command line:
docker-compose up
Leave a Reply