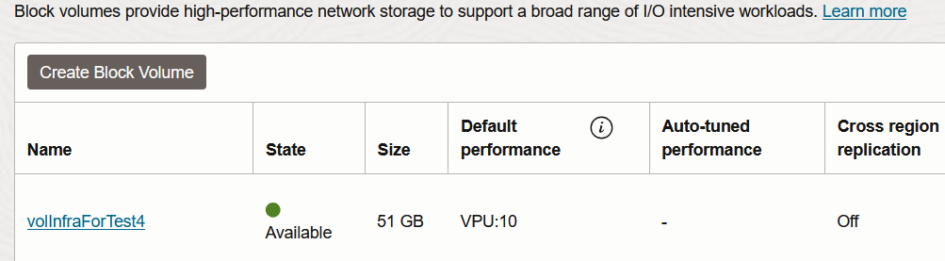
In the OCI console, go to the block volumes menu and create a block volume. Choose in which compartment you want to create your block volume (same compartment as your host), and choose a custom size.
Let the other settings to default
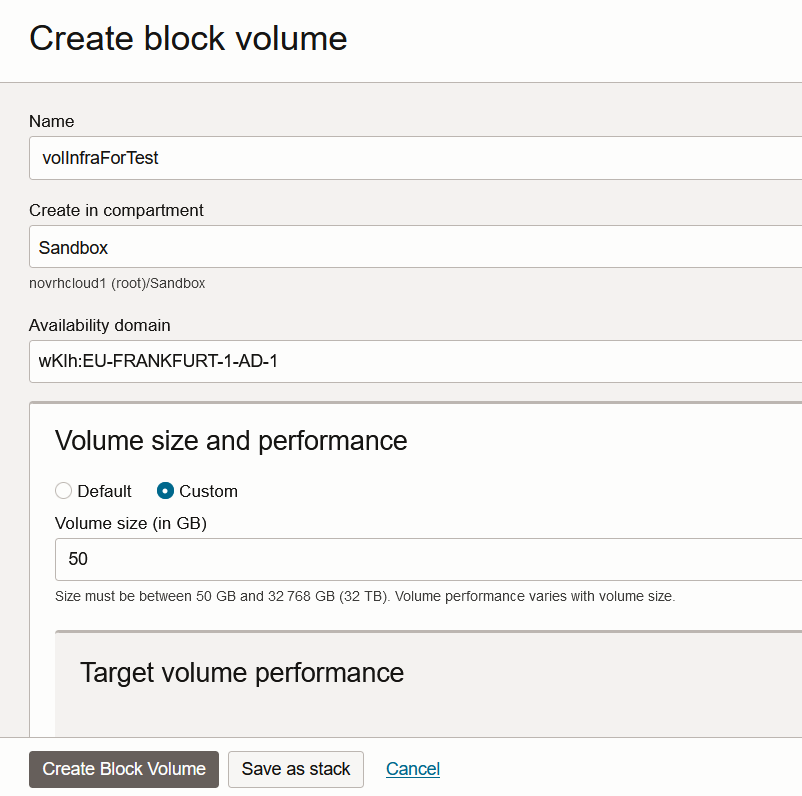
Click create block volume.
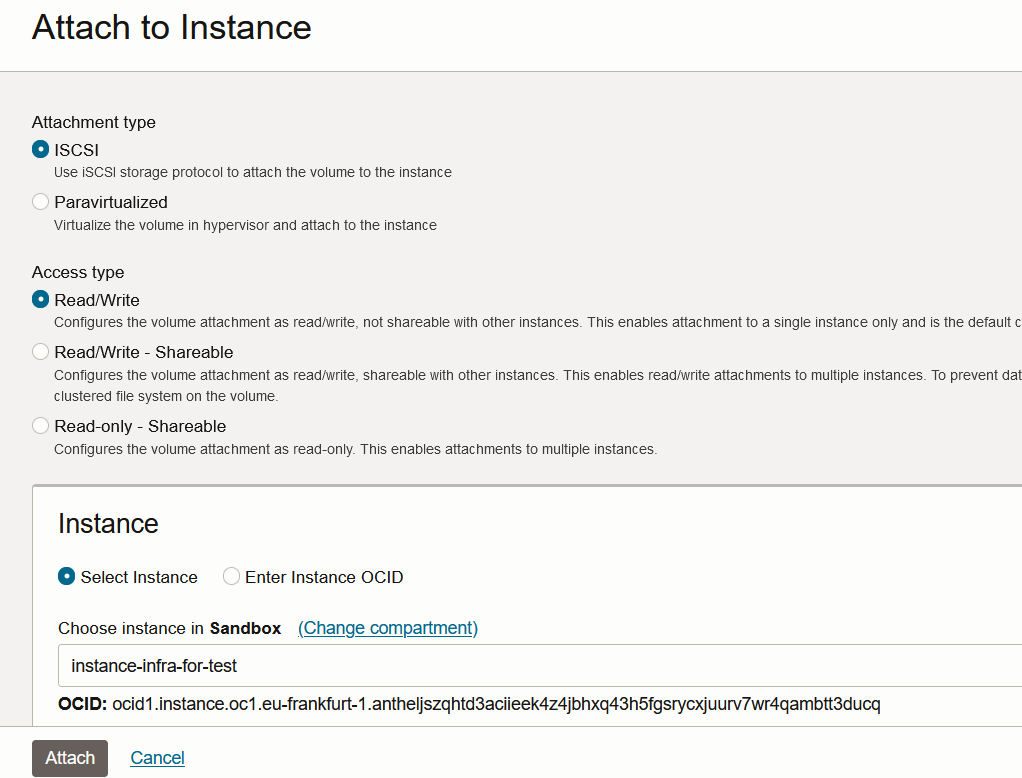
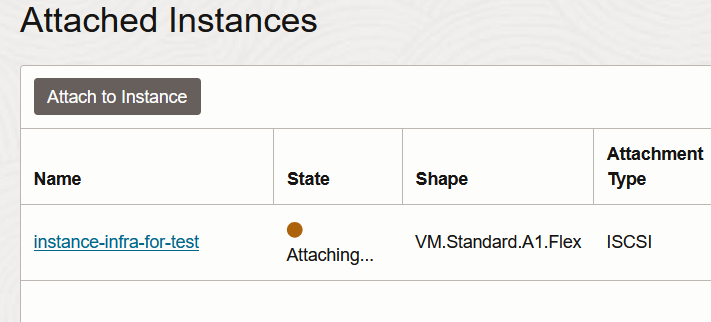
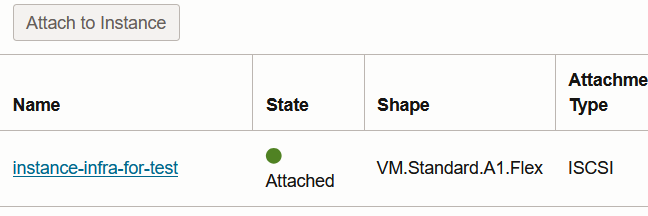
Now on the details of your block volume, go to “Attached Instances” and attach your desired instance.
You can set “ISCSI” and “Read/Write not shareable with other instances”.
If you want to share it with other istances, you’ll have to install a cloud file system to manage simultaneous read/write by the different attached instances (you can have a look to ocfs2).
In our case we don’t share it.
Select your instance (or enter its OCID). You can let the other default settings:
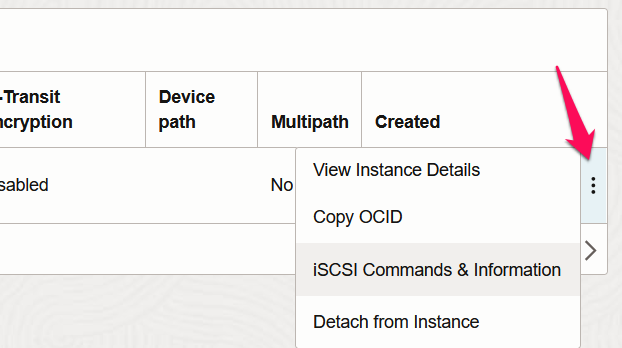
Now that your volume is attached to your instance, click on the menu “iSCSI commands and information” on the right of attached volume:
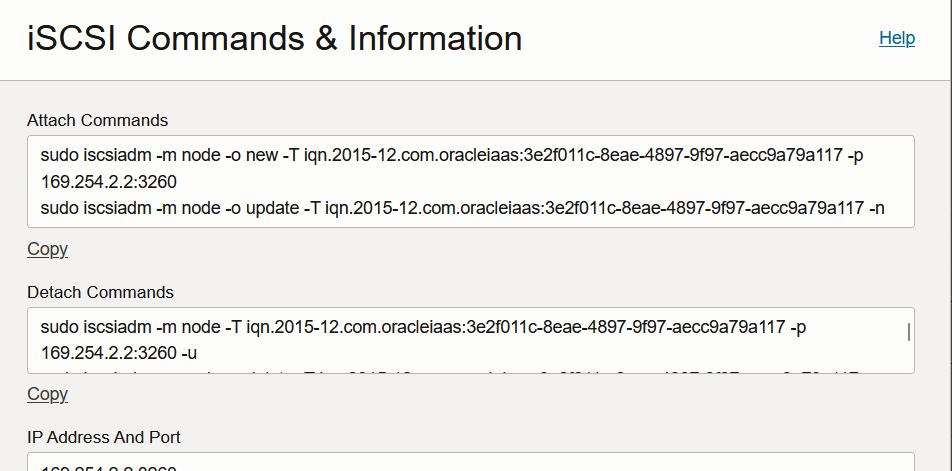
and copy the attach commands:
Now ssh into the target host and execute the lsblk command:
[opc@instance-infra-for-test ~]$ lsblk
NAME               MAJ:MIN RM  SIZE RO TYPE MOUNTPOINT
sda                  8:0    0   47G  0 disk
├─sda1               8:1    0  100M  0 part /boot/efi
├─sda2               8:2    0    1G  0 part /boot
└─sda3               8:3    0 45.5G  0 part
  ├─ocivolume-root 252:0    0 35.5G  0 lvm  /
  └─ocivolume-oled 252:1    0   10G  0 lvm  /var/oled
Now paste the previous attach command you’ve copied and execute it:
[opc@instance-infra-for-test ~]$ sudo iscsiadm -m node -o new -T iqn.2015-12.com.oracleiaas:3e2f011c-8eae-4897-9f97-aecc9a79a117 -p 169.254.2.2:3260
sudo iscsiadm -m node -T iqn.2015-12.com.oracleiaas:3e2f011c-8eae-4897-9f97-aecc9a79a117 -p 169.254.2.2:3260 -lNew iSCSI node [tcp:[hw=,ip=,net_if=,iscsi_if=default] 169.254.2.2,3260,-1 iqn.2015-12.com.oracleiaas:3e2f011c-8eae-4897-9f97-aecc9a79a117] added
[opc@instance-infra-for-test ~]$ sudo iscsiadm -m node -o update -T iqn.2015-12.com.oracleiaas:3e2f011c-8eae-4897-9f97-aecc9a79a117 -n node.startup -v automatic
[opc@instance-infra-for-test ~]$ sudo iscsiadm -m node -T iqn.2015-12.com.oracleiaas:3e2f011c-8eae-4897-9f97-aecc9a79a117 -p 169.254.2.2:3260 -l
Logging in to [iface: default, target: iqn.2015-12.com.oracleiaas:3e2f011c-8eae-4897-9f97-aecc9a79a117, portal: 169.254.2.2,3260]
Login to [iface: default, target: iqn.2015-12.com.oracleiaas:3e2f011c-8eae-4897-9f97-aecc9a79a117, portal: 169.254.2.2,3260] successful.
Now execute again the lsblk command:
[opc@instance-infra-for-test ~]$ lsblk
NAME               MAJ:MIN RM  SIZE RO TYPE MOUNTPOINT
sda                  8:0    0   47G  0 disk
├─sda1               8:1    0  100M  0 part /boot/efi
├─sda2               8:2    0    1G  0 part /boot
└─sda3               8:3    0 45.5G  0 part
  ├─ocivolume-root 252:0    0 35.5G  0 lvm  /
  └─ocivolume-oled 252:1    0   10G  0 lvm  /var/oled
sdb                  8:16   0   50G  0 disk
You can see the the new disk sdb.
Now you will mount it on the file system of your instance, but before you will partitioned this disk with ‘parted’ command.
parted allow to work with partition greater than 2TB. For instance fdisk can’t, fdisk won’t list partitions whose size is greater than 2TB
Execute the following commands:
sudo parted /dev/sdb
mklabel gpt   # Création d'une table de partition GPT (optionnelle si déjà faite)
mkpart primary ext4 0% 100%   # Créer une partition sur tout l'espace disponible
quit

sudo mkfs.ext4 /dev/sdb1
sudo mkdir /fortest
sudo mount /dev/sdb1 /fortest
lsblk
These commands will give you this:
[opc@instance-infra-for-test ~]$ sudo parted /dev/sdb
GNU Parted 3.2
Using /dev/sdb
Welcome to GNU Parted! Type 'help' to view a list of commands.
(parted) mklabel gpt
(parted) mkpart primary ext4 0% 100%
(parted) quit
Information: You may need to update /etc/fstab.

[opc@instance-infra-for-test ~]$ ll /dev/sdb*
brw-rw----. 1 root disk 8, 16 Sep  6 14:44 /dev/sdb
brw-rw----. 1 root disk 8, 17 Sep  6 14:44 /dev/sdb1
[opc@instance-infra-for-test ~]$ sudo mkfs.ext4 /dev/sdb1
mke2fs 1.46.2 (28-Feb-2021)
Discarding device blocks: done
Creating filesystem with 13106688 4k blocks and 3276800 inodes
Filesystem UUID: 2e9a2dbe-66a9-4118-8bfa-5102ed4291dc
Superblock backups stored on blocks:
        32768, 98304, 163840, 229376, 294912, 819200, 884736, 1605632, 2654208,
        4096000, 7962624, 11239424

Allocating group tables: done
Writing inode tables: done
Creating journal (65536 blocks): done
Writing superblocks and filesystem accounting information: sudo mkdir /fortestdone

[opc@instance-infra-for-test ~]$ sudo mkdir /fortest
[opc@instance-infra-for-test ~]$ sudo mount /dev/sdb1 /fortest
You can check the volume is mounted:
[opc@instance-infra-for-test ~]$ lsblk
NAME               MAJ:MIN RM  SIZE RO TYPE MOUNTPOINT
sda                  8:0    0   47G  0 disk
├─sda1               8:1    0  100M  0 part /boot/efi
├─sda2               8:2    0    1G  0 part /boot
└─sda3               8:3    0 45.5G  0 part
  ├─ocivolume-root 252:0    0 35.5G  0 lvm  /
  └─ocivolume-oled 252:1    0   10G  0 lvm  /var/oled
sdb                  8:16   0   50G  0 disk
└─sdb1               8:17   0   50G  0 part /fortest
And now you can make it persistent to your instance reboot, first you identify the uuid of your volume block:
[opc@instance-infra-for-test ~]$ lsblk --fs
NAME               FSTYPE      LABEL UUID                                   MOUNTPOINT
sda
├─sda1             vfat              9F87-476E                              /boot/efi
├─sda2             xfs               9a7a9960-6f65-4746-a0de-01d6201630dd   /boot
└─sda3             LVM2_member       971xpF-iGnv-mBjk-AO1O-Srgh-Q0NE-2Yn1oV
  ├─ocivolume-root xfs               2713f116-9032-4362-8be9-4a7fe68cebd8   /
  └─ocivolume-oled xfs               db083658-3d86-4bc9-ae9d-f3256d686e8c   /var/oled
sdb
└─sdb1             ext4              2e9a2dbe-66a9-4118-8bfa-5102ed4291dc   /fortest
And the add the following to /etc/fstab file:
UUID=2e9a2dbe-66a9-4118-8bfa-5102ed4291dc /fortest ext4 defaults,_netdev,nofail 0 0
Leave a Reply